Resize EBS Volumes with Linux EC2 Instances
Say your company is running a production environment on an EC2 instance—perhaps a small application that doesn’t require many resources.

Since this application uses little storage, a small, 20GB general purpose AWS EBS volume has been employed.

As your business needs grow, you will likely need to add more AWS resources, making it necessary to grow your EBS volume to support more data. Needless to say, you would prefer to do this without any downtime. Let’s take a look at the steps you need to take to do this.
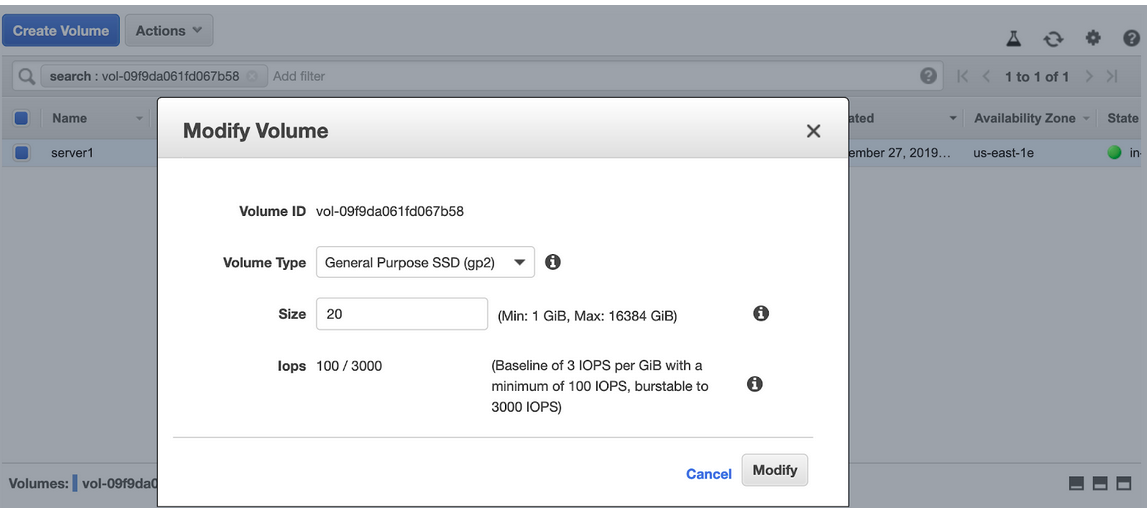
First, go to your volume and choose “Modify Volume” under “Actions.”

You are then given the option to change both the disk size and the volume type.
You can also switch to Provisioned IOPS SSD (io1), increase the size to 100GB, and have the IOPS set to 5000 if your requirements necessitate this step.

Remember that if you are resizing your root volume, you won’t be offered the option to change to Throughput Optimized HDD (st1) or Cold HDD (sc1).
Starting the EBS resizing process
In this example, we’ll extend the volume to 30GB and retain the volume type. To do this, adjust the values and start the resizing process by clicking on “Modify.” The volume will now begin the optimization process, which you can follow on the console.

The time it takes to optimize the volume depends on the volume’s size. In this case, the process took 7-8 minutes. After it was over, the volume state color turned green again, showing that the resizing was finalized.
 After the volume has been extended, the EC2 instance and the system both need to be adjusted to adapt to the new size. Note that you can do this adjustment either as a root or a user with sudo privileges.
The first step in this process is checking the partition size with the code:
lsblk
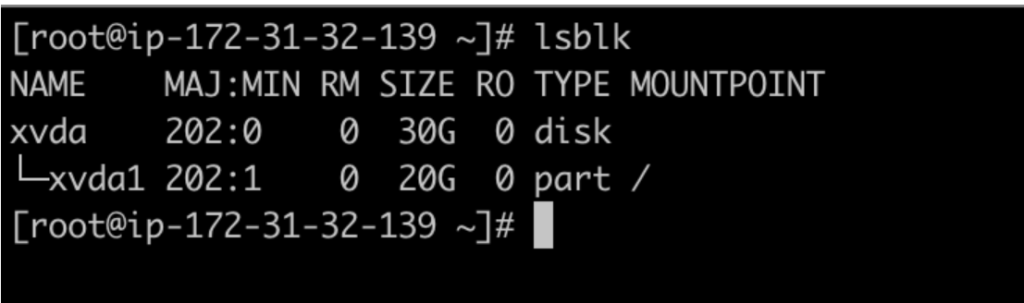
The screenshot above shows that the volume has been extended; however, the primary partition is still at the volume’s original size. To expand the partition, use the command shown below. After you do so, you will see that the partition has grown to match the volume size.
growpart /dev/xvda 1

Note that, in the example screenshot above, there is a space between “/dev/xvda” and “1.” “1” refers to the partition number.
Checking the file system size
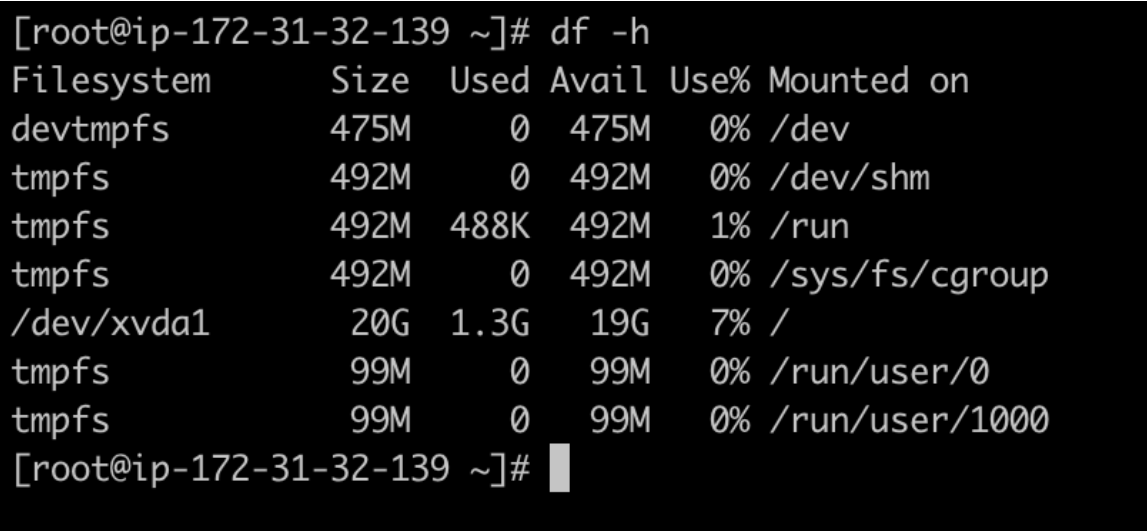
Use the command below to check the file system size.
df -h
In the screenshot below, you will notice that it is still only registering 20GB, even though both the volume and partition have been resized.
Before you start this process, make sure you know which file system you are working with. If you don’t already know, you can find out using the following command:
file -s /dev/xvd*

If you were using an ext4 (or even older ext2 or ext3) file system, you could extend it using the command.
resize2fs /dev/xvda1
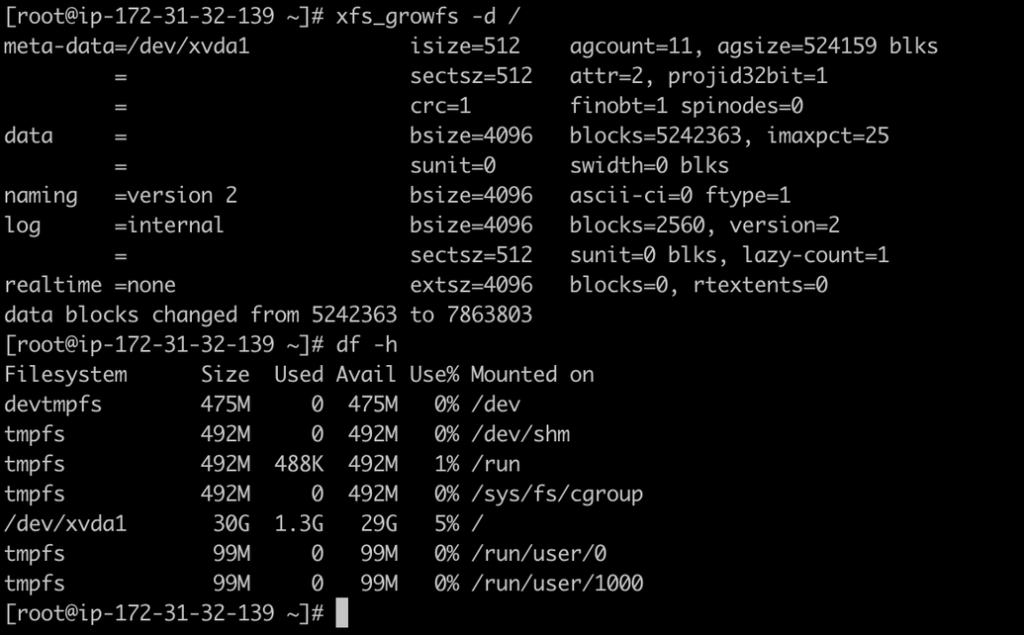
In our case, since the file system is XFS, we have to rely on the “xfs_growfs” tool, which should already be in the system. If not, you can install it yourself as part of the “xfsprogs” package.
Using this, we can proceed to extend the file system to match the volume and the partition size of 30GB. We will target the “/”, since that is where “/dev/xvda1” has been mounted.
xfs_growfs -d /
The volume is now fully resized and ready to be used. No downtime resulted from this process.
You can also extend the partition and file system size after you have already grown the volume on the AWS side by simply rebooting your instance. When the operating system comes back up, it will modify everything itself.